Introduction
After an Image build is complete, it’s necessary to check the existing applications against the reference list, to see if something missed.
Mostly you can implement this part in the ESD Solution, to check winword.exe, excel.exe, adoberdr.exe and all the other apps and executables that are required, are present on the image or you can use this script as I described here.
This script is the latest one to be executed before you deploy or seal your image.
Test with Pester and Extend Framework
Since Windows Server 2016 and Windows 10 Pester is build-in the operating system and you can easily use it with your Powershell scripts. Also I play around with ReportUnit, a great ReportEngine to create html reports based on the Pester output. ReportUnit is deprecated now and replaced with a new one, called extend-framework.
This Blog shows you the usage of the Powershell Pester module with the new extend framework to create a simple html report.
Download the required components
Get the latest Release v1.1908.0 from my Github Repository
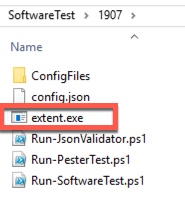
Please refreshSecond, download the extend.exe from https://github.com/extent-framework/extentreports-dotnet-cli/tree/master/dist and place it in the root folder of the extracted SoftwareTest folder.
The result looks like this.
Configuration
The configuration is complete managed in the config.json that can be found in the root folder, this must be modified for your environment.
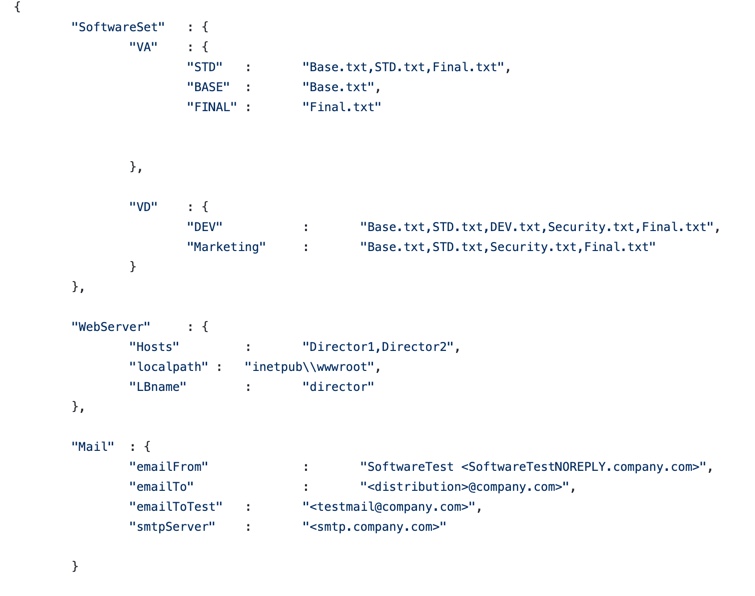
The configuration is split up in different parts, as I explain it now a little bit deeper:
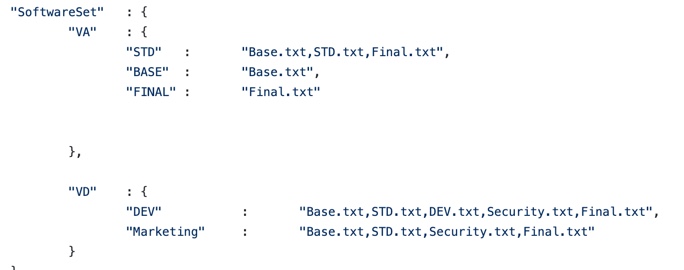
SoftwareSet
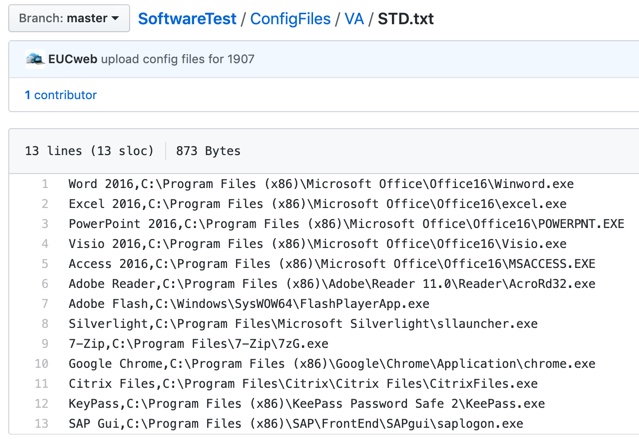
This is the combination of the different parts to be checked, like Base.txt, STD.txt,Final.txt. Inside of the text files you are list the executables or files to be checked (see below in chapter Reference Files)
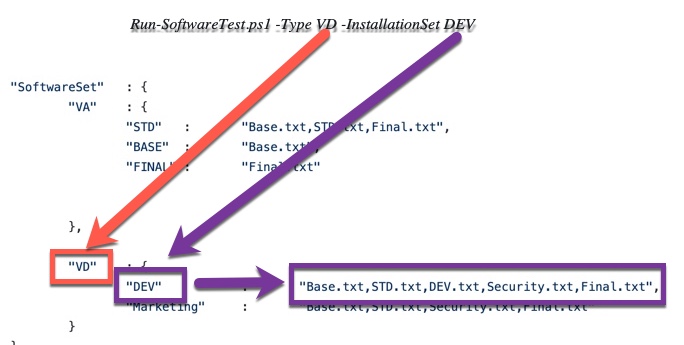
VA (Virtual Apps) or VD (Virtual Desktops) is the Type you defined. The Name DEV or Marketing is the Softwaresets to the different reference text files. You can use your own Softwaresets with a friendly name here.
WebServer
If the pester test is finished the extend.exe grab the output and create a single html report, this report will be hosted on a IIS Webserver. The Script uses the Webserver configuration to move the created index.html to \\Director1\c$\inetpub\wwwroot\SoftwarerTest\%computername%\index.html and to the Director2 too. The user who runs the script must have write access to the UNC path.
The link in the E-Mail configuration is pointed to the LoadBalancing name (LBName) , called https://director.%userdnsdomain%/SoftwareTest/%Computername%\index.html

E-Mail configuration
After the script is running and create the report on the WebServer, a E-Mail is sending out to the configured emailTo address.
The emailToTest is used only if you use the –TestMode argument switch

Json Validation
After you have change the json file for your environment, it’s possible to check the formatting of the json file is valid, otherwise you receive a error if you start the Run-SoftwareTest
start the Run-JsonValidator.ps1 directly from the root folder, it checks all recursive json files and hopefully you got the following output, otherwise you must re-check the json for any format error or typo.

Configure the Reference Files
In the ConfigFolder and the Type VA or VD you can edit the textfiles for your software to be checked on the image.
Get-Help of the script
get-help Run-SoftwareTest.ps1 -full will gives you the following output
.SYNOPSIS
run Software Test with Pester. This is the inital script to trigger
.DESCRIPTION
Running Powershell Pester to test the exiting executables on your Image if all applications are installed.
it Send out the output to ReportUnit to generate a html report
.PARAMETER Type
possible Value, it uses the Types from the config.json. You can add your own, if you like
VA = VirtualApps
VD = VirtuelDesktops
.PARAMETER InstallationSet
Defines which Set of files are used to check if the software is sinstalled
.PARAMETER SkipMail
Switch: Skips the Mailsend, make no sence with Switch TestMode
.PARAMETER TestMode
Switch: Will use the emailToTest instead of the emailTo of the config.json. Can be used for debug only
.EXAMPLE
Running a Virtual Desktop (VD) SoftwareTest on the DEV InstallationsSet
Run-SoftwareTest.ps1 -Type VD -InstallationSet DEV
.EXAMPLE
Running a Virtual Apps (VA) SoftwareTest on the Standard InstallationsSet
Run-SoftwareTest.ps1 -Type VA -InstallationSet STD
.EXAMPLE
Running a Virtual Apps (VA) SoftwareTest on the Standard InstallationsSet and skips the Mail delivery
Run-SoftwareTest.ps1 -Type VA -InstallationSet STD -SkipMail
.EXAMPLE
Running a Virtual Desktop (VD) SoftwareTest on the DEV InstallationsSet and send the Mail to the Test Receipient only
Run-SoftwareTest.ps1 -Type VD -InstallationSet DEV -TestMode
The following picture gives you a better explanation how it works together.
E-Mail Report
After successfully creation, you will receive a E-Mail with the following content, like this:
Softwaretest is running with Type VD and and checking Softwareset DEV. Click here for more information to see which tests are failed (Passed Test 63 – Failed Test 2) : Result of Software Installations Win10-1809-Master
(a Test report can be open up in the Link above)
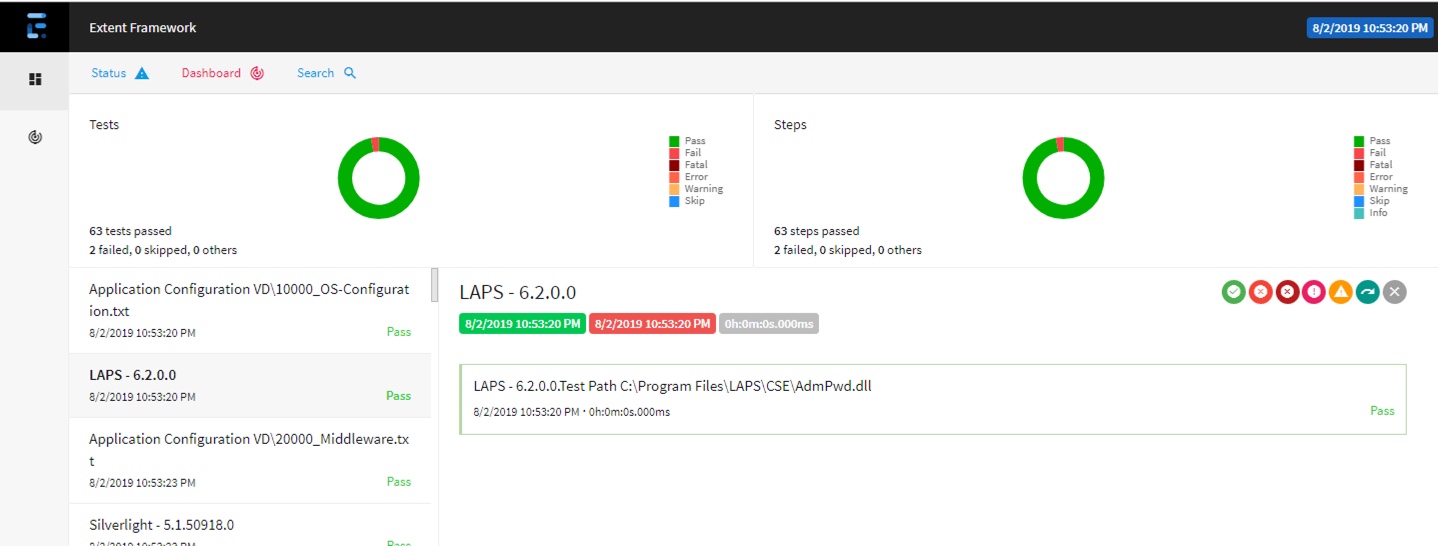
The report gives you a first overview of the Application checks
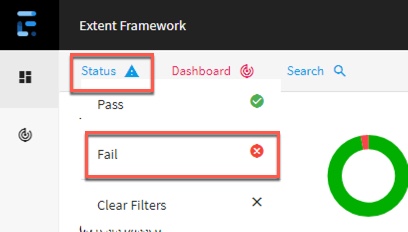
In the top menu you can filter the Status, to see the failed tests only.
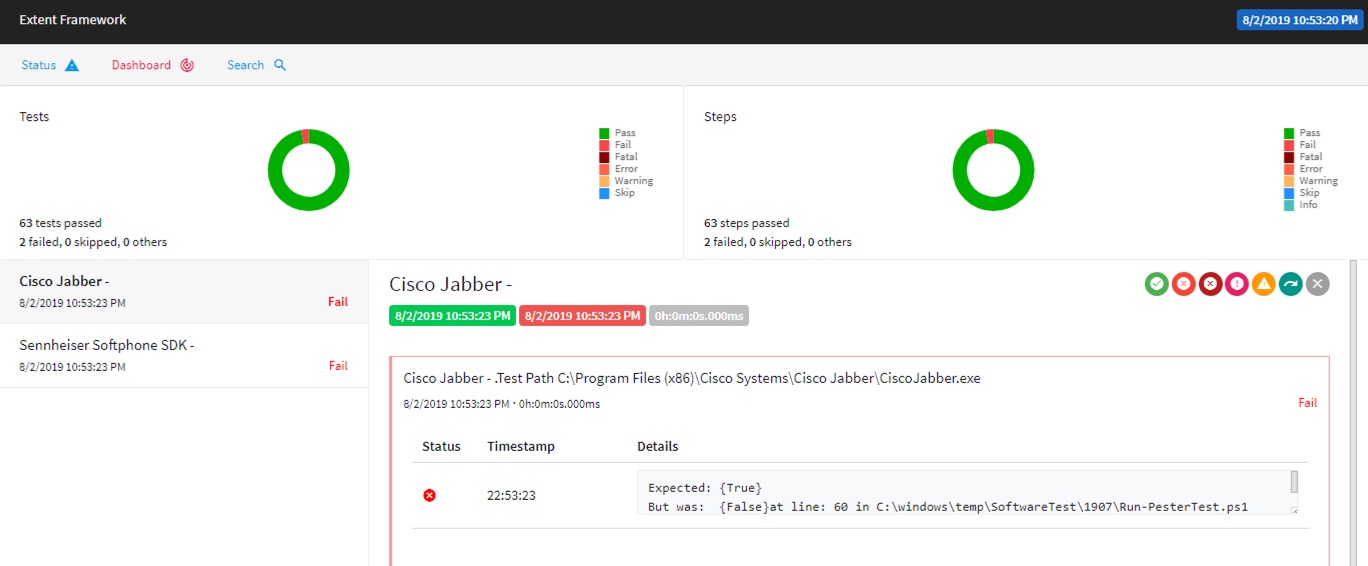
In the filtered page you get the failed tests and on the right side of the report the path to the missed executable is listed too.
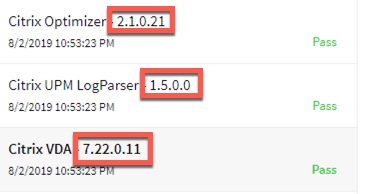
In Addition you can easily search for a bunch of components like “citrix” for example to filter the result for your search only.

The report shows the grabbed Version of the executable you are entered in the Reference File, this can be useful to check if the right version is installed.
Conclusion
I’m using this reporting since 2 years in different environments and change it last week to the new report engine. Feel free to use and modify it for your own and let me know your thought’s.